In the page Connecting to an organization, we explained how to create a new connection. This page focus on managing existing connections.
To manage connections, you need to open the Connection Manager, available in the main menu Tools.

Available operations

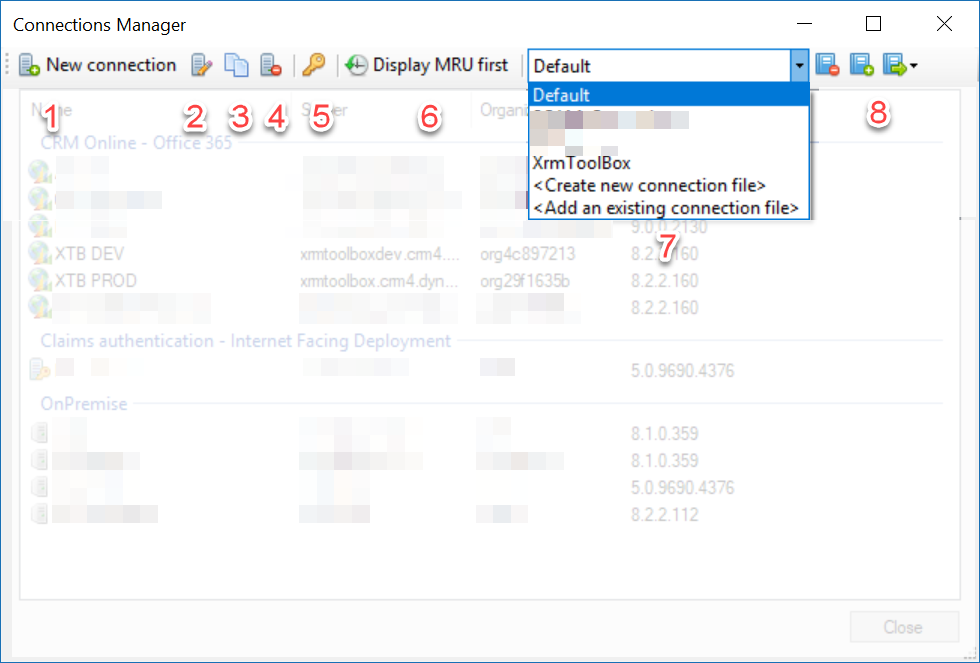
1 - New connection
This part is covered in this page
2 - Edit connection
When editing a connection, the connection wizard is displayed with existing values. You can then change any of these values. Depending on the value changed, the connection wizard can ask to test again the connection to ensure connection properties are valid.
Note that you can rename a connection by selecting it, then clicking once again on the name of the connection. The name is now in edit mode.
3 - Clone a connection
You can use this button to clone a connection that will have the same values.
4 - Delete a connection
Use this button to delete a connection.
5 - Change password for connection
Use this button to change the password of one or multiple connections. No control is made to determine if the password is valid for the connection
6 - Change display style
If this button is checked, the connections are displayed with the most recently used ones first. If not, connections are sorted by type and alphabeticaly
7/8 - File management
XrmToolBox proposes a feature to group connections in files to allow you to manage your connections by customer or by project, for example.
In the dropdownlist, you can:
- Select the file to display. There is always an existing default file of connections, located in the Connections folder of your XrmToolBox storage folder.
- Create a new empty file of connections. If so, you are prompted for a file name and location
- Add an existing file of connections.
Three additional buttons are available to:
- Remove the selected connections file. This does not actually delete the file but just remove it from the list of available connections files
- Move the selected connections to a new file
- Move the selected connections to an existing file


